💡 Skip ahead to:
What is So Special about Allxon OTA Deployment?
Allxon OTA Deployment is an innovative solution that helps you maximize remote edge AI device management functions with Over-The-Air tools. The power of Allxon OTA Deployment solution lies in the ability to let you deploy and update mass distributed Edge AI devices within 3 steps: preparation, upload, and deployment. To empower and add value to all hardware with software services, you can experience the 3 key benefits of OTA deployment via Allxon first-hand:
- Scalable and Stable Fleet Updates: 1 single portal to manage all OTA updates.
- Flexible and Diverse Requests: supports a wide range of OTA update requests, such as docker, image, file, videos, etc.
- Secure and encrypted process: safely encrypted processes when conducting OTA updates.
What You Will Need
- Edge devices with Allxon Agent version 3.03 and above (update now
 )
) - OTA artifact (generate your OTA artifact )
💡 TIp: How to update Allxon Agent ![]()
Allxon OTA Technical Overview
This document provides a technical overview of the Allxon Over-The-Air (OTA) update mechanism, highlighting its core concepts, artifact structure, deployment stages, and error-handling processes. The system is designed to simplify and secure updates for edge devices, ensuring consistent performance and reliability.
1. Core Concept
At the heart of Allxon OTA is the secure and reliable delivery of artifacts to target edge devices. The Allxon Agent, running on each device, is responsible for receiving and executing these artifacts, completing the full OTA update process.
2. The Allxon Artifact
An artifact is a package generated by the Allxon Command Line Interface (CLI). Each artifact includes a key script file named ota_deploy.
- Linux Systems: On Linux, ota_deploy is a .sh (shell) script. For CLI usage on Linux, see Generate OTA Artifact using Allxon CLI (Linux).
- Windows Systems: On Windows, ota_deploy is a .bat (batch) script. For CLI usage on Windows, see Generate OTA Artifact using Allxon CLI (Windows).
The ota_deploy script is fully user-programmable, enabling developers to define the exact steps and logic required for their OTA updates. Typical operations may include installing software updates, applying configuration changes, or updating device firmware.
3. Deployment Process and Error Handling
Artifacts are deployed in sequential stages, each with built-in safeguards to ensure robust and manageable updates. OTA deployments can be triggered directly from the Allxon Portal.
3.1 Stage 1: Download
- Resume Capability: The Allxon Agent can resume interrupted downloads if the network outage lasts less than 1 minute.
- Failure Condition: If the issue persists beyond 1 minute, the deployment fails at this stage.
- File Integrity: A file integrity check ensures that the artifact is not corrupted before proceeding.
3.2 Stage 2: Extract
The Allxon Agent extracts the artifact’s contents to a designated temporary location, preparing it for execution. For information about storage locations, refer to the System Storage documentation.
3.3 Stage 3: Execute
If errors occur during the Extract or Execute stages, the Allxon Agent will not retry the operation. This strict policy helps avoid repetitive failures and maintains a clear failure state.
3.4 Execution Privilege
The Allxon Agent runs with root privileges, meaning the ota_deploy script is also executed with root-level access. This ensures it can perform any necessary update operations on the device.
3.5 Exit Code Handling
- Exit Code 0: Indicates the OTA update executed successfully.
- Non-Zero Exit Code: Indicates the OTA update failed.
3.6 Troubleshooting Failed Deployments
If a deployment fails, users can:
- Test Locally with the Allxon CLI: Run the artifact locally on a test device to identify issues with the ota_deploy script or the artifact itself.
- Check the Allxon Portal OTA Page: This page provides a detailed status of each deployment, showing the exact stage (Download, Extract, or Execute) where the error occurred.
4. Advanced Usage: OTA Arguments
For advanced use cases, including runtime OTA arguments, please refer to the OTA Argument documentation.
How to Deploy OTA Artifact:
1. Prepare and Generate Artifact
To prepare your artifacts, use the Allxon Artifact Toolkit to package the file you want to update (application/file/BSP image/script/video, etc.) as well as the executable scripts into a file type that can be read and recognized by Allxon Agent & Allxon Portal.
💡 Tip: How to generate OTA artifact with Allxon Artifact Toolkit here ![]()
2. Upload OTA Artifact
Once your artifact has been prepared, get ready to upload it onto Allxon Portal.
How to Upload OTA Artifacts:
- Enter Allxon Portal and select the OTA icon on the left navigation pane to enter OTA Deployment Page.
- Click on the + Upload Artifact button on the top right to start the uploading process.


- Drag or select the artifact file that you want to upload, and the upload process will start automatically
💡 Note: Only artifacts generated by Allxon Artifact Toolkit can be supported here. Do not edit the file name of the artifact.
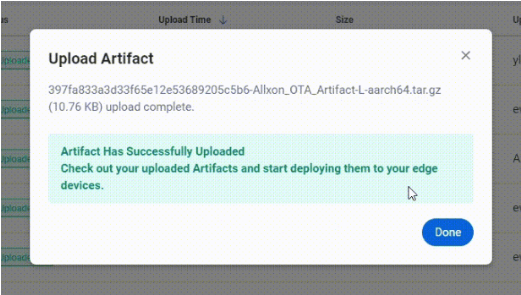
- When the artifact upload is complete, a success message will pop up. Click on the Done button.
- Your artifact will now appear in the artifact list with the Status to be "Uploaded."

💡Tip:
The artifact display name is the same as the artifact file name. You can edit the display name by clicking on "•••".
3. Deploy OTA Artifact
The power of Allxon OTA artifact deployment lies in its ability to deploy mass artifacts to scattered Edge AI devices in a matter of minutes.
How to Deploy Artifacts:
- Click the Deploy button on the far right of the artifact.

- First, select the device group you want to deploy on the left. And then, select the devices in the selected group that appear on the right. Click Next to continue.

- Preview your OTA deployment and click on Deploy.

- Once deployment is successful, a deployment activity will be shown in Deployment Activities tab, with the Display Status to be Complete.

💡Note: When deploying the artifact, there’s an advanced feature that allows you to set command-line arguments for a more flexible process.
👉🏻 Learn more: Deploy OTA Artifact with Command-Line Arguments
-----------------------------------------------------------------------------