Introduction
OTA artifacts, generated with Allxon CLI for Over-The-Air updates, are comprehensive packages that support mass updates of various media types, firmware, drivers, containers, and image files. etc. With just four simple steps, you can ensure the success of OTA updates across your remote edge AI device fleets.
SKIP AHEAD TO:
What you will need
-
Allxon CLI on the Edge Device
Allxon CLI is a command-line interface that enables communication with the installed Allxon Agent, facilitating tasks such as generating OTA artifacts. Visit the GitHub page for more information on its usage.
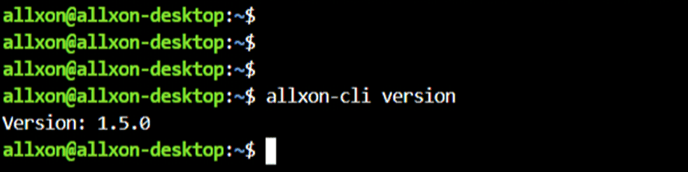
Allxon CLI comes automatically installed with Allxon Agent on your edge AI devices. If you haven't installed Allxon Agent yet, follow the instructions provided in the link. Once installed, you can check the Allxon CLI version using the following command:
$ allxon-cli version
-
Allxon Hello OTA Example
To get started, it’s recommended to begin with an example. You can download the Allxon Hello OTA example by clicking here, or use one of the following commands to download it through your device’s Terminal:
-
wget https://github.com/allxon/allxon-hello-ota-example/archive/refs/heads/main.zip
-
git clone https://github.com/allxon/allxon-hello-ota-example.git
-
-
Agent version 3.11.2 or higher
Explore the details of the example content on the related GitHub page.
Generate an OTA Artifact with Allxon CLI on an Edge Device
Step 1 – Prepare OTA Content Files
Extract the downloaded OTA example content
$ unzip allxon-hello-ota-example-main.zip
Step 2 – Prepare Executable Script
Check the execution commands in the ota_deploy.sh
$ cd allxon-hello-ota-example-main/
$ cd ota_content/
$ cat ota_deploy.sh
💡 Note: The ota_deploy.sh script is executed after the OTA artifact is delivered from Allxon Portal to your edge device. In this example, you'll see other OTA attached files being moved around folders after the artifact is deployed.
Step 3 – Generate OTA Artifact
Once the OTA files and executable script are ready, follow these instructions to pack and generate your OTA artifact.
-
Execute the following command in the terminal to package your artifact:
$ cd ..
$ allxon-cli ota make -d ota_content/

Upon execution, the artifact will be generated and displayed along with a hash code for checksum examination, as well as the name of the designated folder for improved readability. For example:
[hash code]-[ota content folder name]-L-aarch64.tar.gz
In other words, you can enhance the readability of artifact names by renaming the content folder.
💡 Important Points:
1. Allxon also offers cross-platform artifact creation, such as generating aarch64 artifacts on an x86 platform for development purposes.
More details are available on our GitHub page: https://github.com/allxon/allxon-cli/blob/master/ota.md
2. After execution, it's crucial to verify the generated artifact on the target platform before mass deployment, as detailed in the following chapter.
Verify the Generated OTA Artifact Before Mass Deployment
It's recommended to verify the generated artifact locally before proceeding with upload and mass deployment. Allxon CLI includes an easy-to-use OTA test function for quick verification.
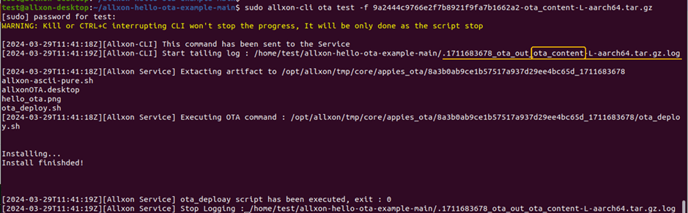
Step 1 – Verify Generated Artifact
Activate the generated artifact locally using the following command:
$ sudo allxon-cli ota test -f [name_of_your_artifact]
💡 Note: This action simulates an OTA deployment by unpacking the artifact and executing ota_deploy.sh. Verify that the deployment operations align with the specifications in the script.
Step 2 – Check the Results
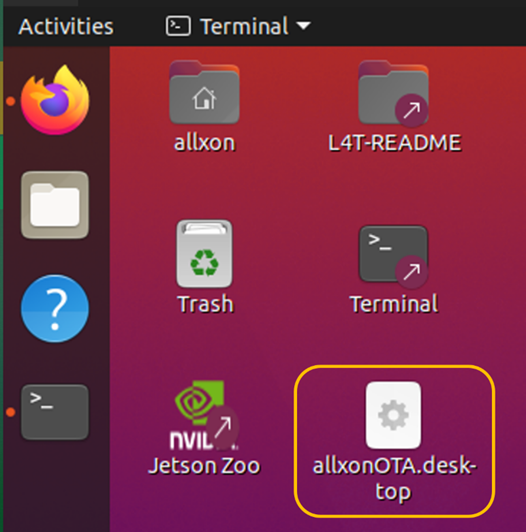
In this example, a file named allxonOTA.desktop will be moved to your device's Desktop.
Additionally, this verification function also generates an execution log of the tested OTA deployment, making troubleshooting easier. You can easily locate the log file using the name of your content folder. The following picture provides an example of what it looks like:
You're all set! With your first OTA Artifact ready, it's time to move on to the next article and discover how to deploy your OTA artifact from Allxon Portal to your fleet of devices.
Appendix:
Allxon Hello OTA Example Content Explained
The folder structure of the downloaded Allxon Hello OTA example illustrates where to input your files and directories for smooth packaging of your first OTA artifact.
allxon-hello-ota-example-main/
- ota_content:
Contains all necessary files for OTA deployment to edge devices. - ota_deploy.sh:
An executable script managing all operations related to OTA deployment. Customize the process by incorporating corresponding commands into this automation script, which will be automatically executed by Allxon Agent after the artifact is downloaded and unpacked. - allxon-ascii-pure.sh/allxonOTA.desktop/hello_ota.png:
Example files used for demonstration can be replaced with your own desired files. In this Hello OTA example, you will observe these files being moved around folders. Refer to the ota_deploy.sh above for more details.
-----------------------------------------------------------------------------
Next article →
Generate OTA Artifact using Allxon CLI (Windows)