Instruction
Allxon provides fast and easy Allxon Agent installation process. Follow the steps below to install.
<Environment> At your edge device.
Recommended OS*:
> Linux ARM64 (NVIDIA Jetson): L4T 35.6.4 to L4T 36.4.3
> Linux X86: 22.04, 24.04
> Windows 10/11 (x86_64) enterprise LTSC

* For support in other operating systems or versions, please contact us to confirm availability.
Let’s Get Started!
💡Note: Before initiating the Allxon Agent installation, ensure that your edge devices have synchronized clocks, stable internet connection, and keep the device powered on throughout the process to avoid installation issues.
Learn more on How do I avoid Clock Offset?
1. Follow the instructions below to install Allxon Agent on your edge device:
For Linux OS:
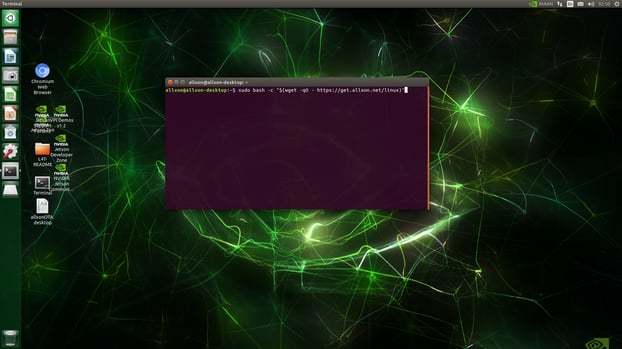
- Step 1:
- Open a new tab in the Command Prompt and enter the following command without inserting a newline in Terminal or your SSH client:
sudo bash -c "$(wget -qO - https://get.allxon.net/linux)"
[Optional] You can include the parameter behind the command line to assign a specific name or edit device profile. Learn More: How to Install Allxon Agent with Device Name or Device Profile Options?
- Open a new tab in the Command Prompt and enter the following command without inserting a newline in Terminal or your SSH client:
-
- After the command has completed, you will see:
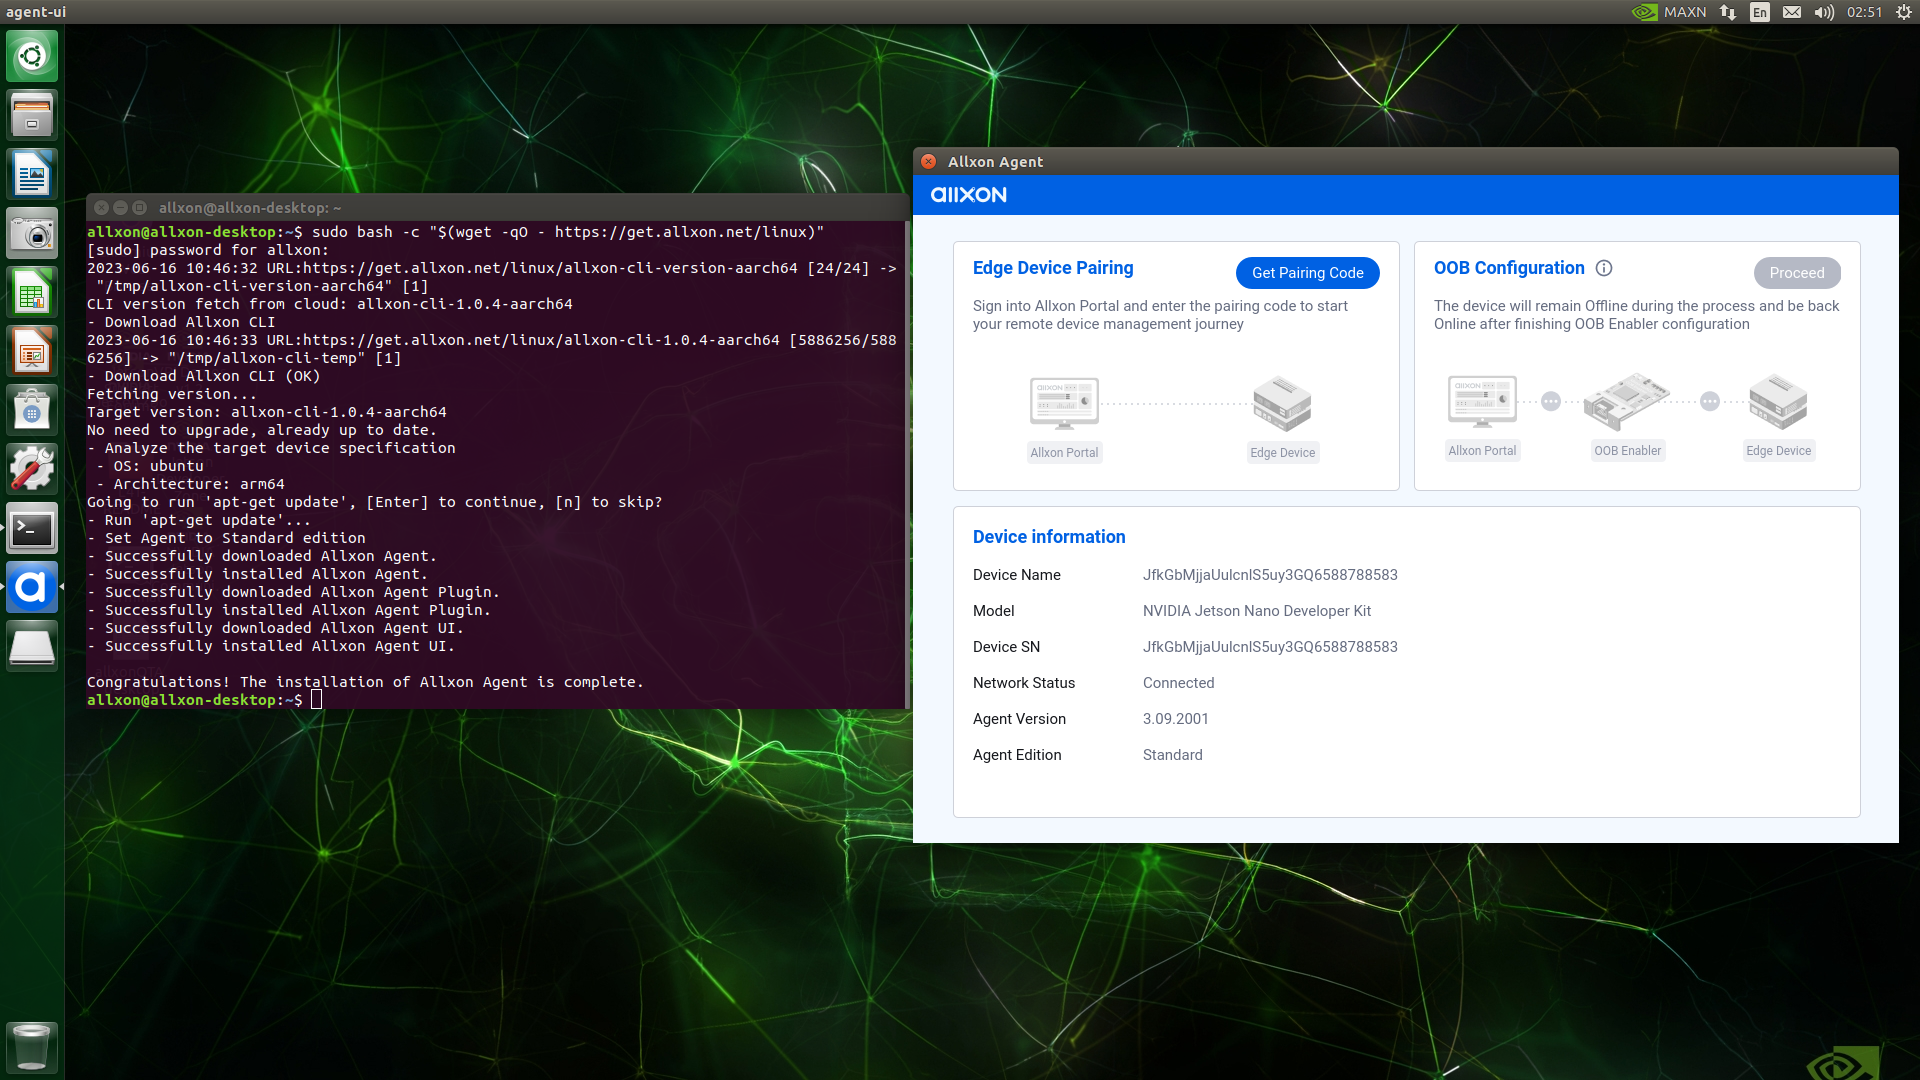
- After the command has completed, you will see:
💡Note: If you encounter the HTTP 403 error code during installation, learn more on Why Am I Failing to Install Allxon Agent (HTTP 403)?
- Step 2:
After installation, Allxon Agent should start up automatically. Upon successful installation, reboot your device.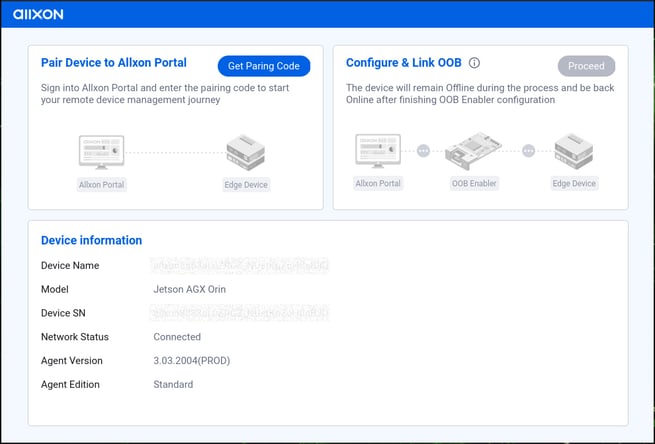
For Windows OS:
- Step 1:
- Open the PowerShell as an Admin and enter the following command:
Set-ExecutionPolicy RemoteSigned -Scope Process -Force; Invoke-WebRequest -Uri "https://get.allxon.net/windows" -OutFile "$env:TEMP\allxon-installer.ps1"; & "$env:TEMP\allxon-installer.ps1"
[Optional] You can include the parameter behind the command line to assign a specific name or edit device profile. Learn More: How to Install Allxon Agent with Device Name or Device Profile Options?
- Open the PowerShell as an Admin and enter the following command:
- Step 2:
After entering the command, you'll see the processing screen displayed below:-png-2.png?width=670&height=301&name=image%20(6)-png-2.png)
- Step 3:
After the processing is complete, Allxon Agent should start up automatically.-png-2.png?width=670&height=453&name=image%20(11)-png-2.png)
💡Note: If you’re unsure about the available commands or need guidance on the correct parameters, use the -h option to view a complete list of CLI commands and their descriptions. This can help you quickly find the correct usage.
-----------------------------------------------------------------------------
Library dependency list
List of library or package dependencies of Allxon Agent.
-
Ubuntu (ARM, x86) 20.04, 22.04
|
Package |
Description |
||
|
1* |
libc6 | necessary libraries for executing Allxon Agent | |
|
2 |
libstdc++6 | ||
|
3 |
zlib1g | ||
|
4 |
coreutils |
basic Linux tools |
|
|
5 |
util-linux | ||
|
6 |
network-manager | network tools for OOB pairing and network information | |
|
7 |
dmidecode |
system information tool | |
|
8 |
tar |
data compression tool | |
| 9 | gnome-screenshot | tool for taking screenshot | |
| 10 | zip | file compress program |
* “gcc-multilib” and “g++-multilib” are the default packages in Ubuntu 18.04 (ARM), please ensure that either one of the packages is installed.
---------------------------------------------------------------------------
Next article →